
This is an easy one. In order for our dear leader Goose to safely venture into the wilderness, we needed to build her a bluetooth collar out of an HC-05 and a 3v Arduino. Its sort of like a primitive avalanche beacon, or glorified keyfinder.
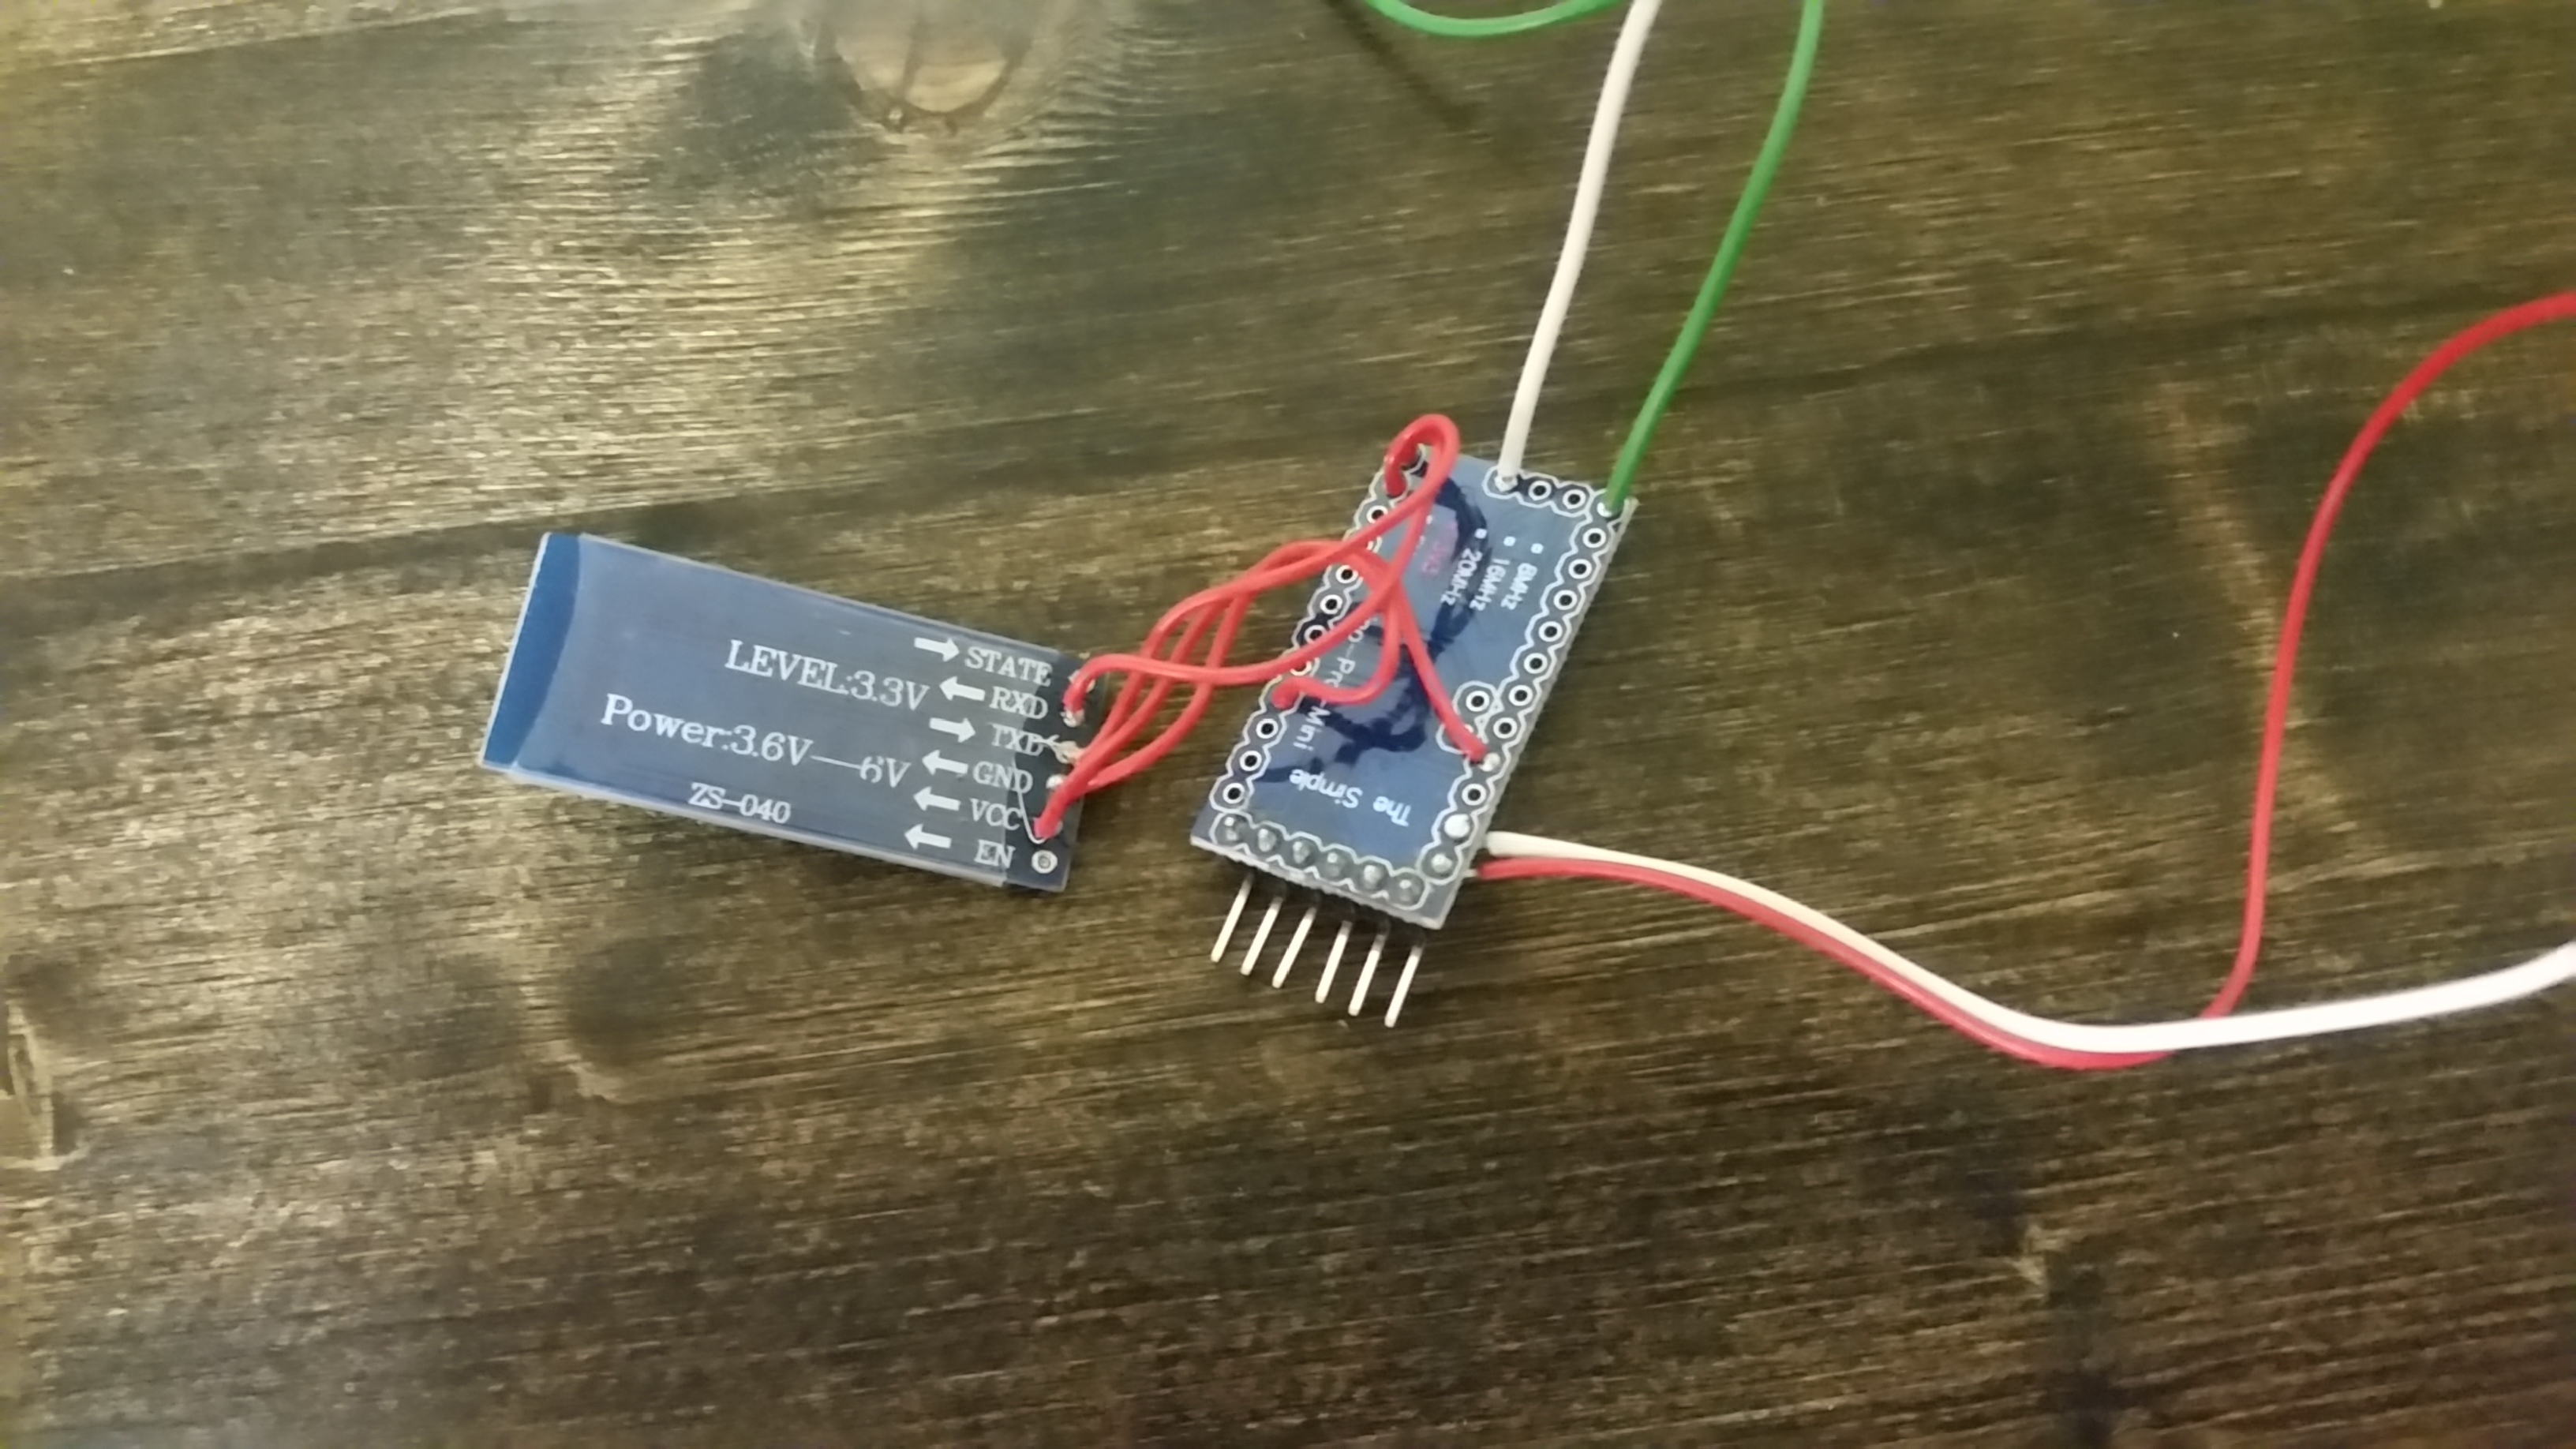
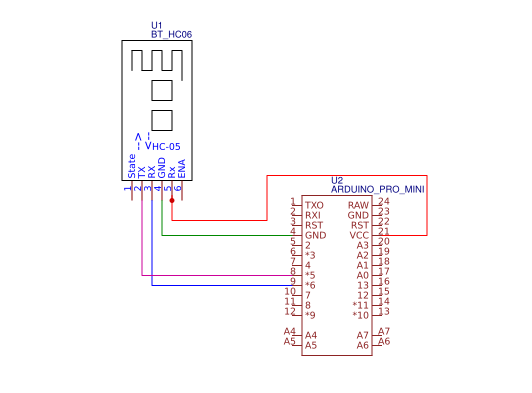
A simple terminal app is all that is needed to interact with the HC-05 and Arduino. Because the HC-05 is not 5 volt tolerant, I opted to use a 3 volt Arduino Pro Mini(328 8mhz). No voltage dividers are needed this way, and powering both is simple. All that is required is a little soldering. If you use a 5v Arduino or Arduino clone, at best it won’t work, and at worst you will cook the HC05.

If you haven’t used an Arduino Pro Mini, you will probably need an FTDI cable to program it. I use the one from Modern Device – FTDI Programmer – $14.00
BOM
Your Bluetooth enabled Phone.
22 or 24 gauge wire to make connections, basic soldering equipment.
HC-05 Bluetooth Module – $8.49 on Amazon
Arduino Pro Mini 3v (8mhz 328) – $12.99 on Amazon
Bluetooth App – Bluetooth Terminal, download from Google Play
Per the usual disclaimer on costs; all the above parts can be found cheaper from Banggood, Ebay, Aliexpress etc… But I don’t bother to find links to them, they are hard to recommend because seller support sucks, and lead times are often long.
The Arduino Code:
/*

 *  Loyal Order of Goose Bluetooth Collar Locator

 *  http://loyalorderofgoose.com/iot-electronic-bits/wireless-communication/hc-05-arduino-bluetooth-cat-locator/

 *

 */
#include
SoftwareSerial BTserial(8, 9); // RX | TX
char junk;
String inputString="";
const long baudRate = 38400;
void setup(){
BTserial.begin(9600); // Instead of serial, use software serial pins 8 and 9
// Serial.begin(9600);
pinMode(13, OUTPUT); // Built In LED
pinMode(10, OUTPUT);
}
void loop()
{
if(BTserial.available()){
while(BTserial.available())
{
char inChar = (char)BTserial.read(); //read the input
inputString += inChar; //make a string of the characters coming on serial
}
Serial.println(inputString);
while (Serial.available() > 0)
{ junk = Serial.read() ; } // clear the serial buffer
if(inputString == "a"){ //in case of 'a' turn the LED on
digitalWrite(13, HIGH);
digitalWrite(10, HIGH);
}else if(inputString == "b"){ //incase of 'b' turn the LED off
digitalWrite(13, LOW);
digitalWrite(10, LOW);
}
inputString = "";
}
}
From the Bluetooth terminal app, all you have to do is send “a” or “b” after connecting to the device. I attached the arduino to a small piezoelectric speaker, to make the beep sound in the video below. Which is why I have Pin 10 defined, not just the built in LED.
Comments are closed here.